

Sale!


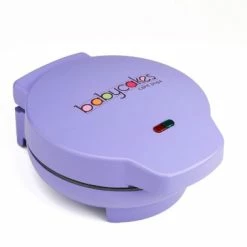


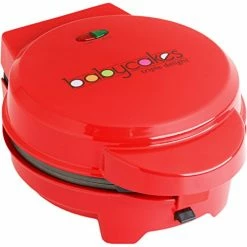
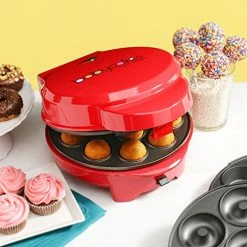
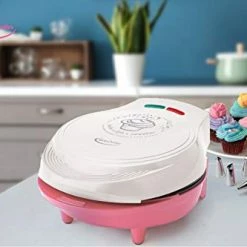
Brand new 🔥 Babycakes CP-12 Cake Pop Maker, 12 Cake Pop Capacity, Purpl 🔥
Original price was: $32.99.$26.39Current price is: $26.39.
- Control the delivery date and try to deliver it in the fastest time
- The quality solution for all your needs.
- 100% High Quality Guarantee
- Safe Payments, Secure Personal Information

- Special Feature: Manual
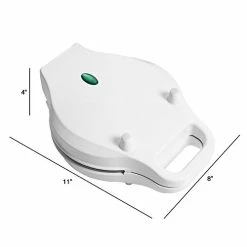
- Color: Purple
- Material: Plastic
- Brand: Babycakes
- Product Dimensions: 8.07″D x 9.84″W x 4.72″H
- Wattage: 800.00
- Item Weight: 3.6 Pounds
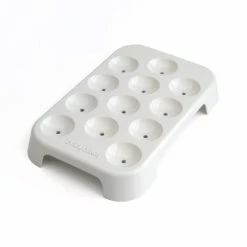
- Included Components: Cake Pop Maker, (50) paper sticks, Fork tool, Cooling stand
- Style: Nonstick,Electric
- Voltage: 120 Volts
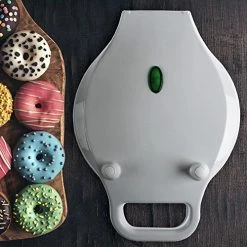
- Bake 12 cake pops or doughnut holes in minutes
- Nonstick baking plates for ideal results and easy clean up
- Includes plastic cake pop stand, fork tool, 50 cake pop sticks and recipes
- All Babycakes electric products are 120V, 60Hz
6 reviews for Brand new 🔥 Babycakes CP-12 Cake Pop Maker, 12 Cake Pop Capacity, Purpl 🔥
Add a review
Related products
Sale!

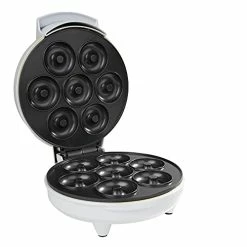
Electric Cake Pop & Mini Cake Makers
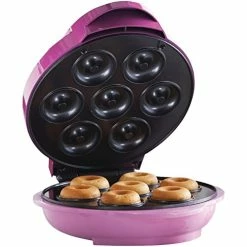
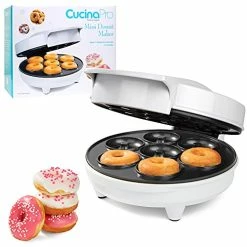
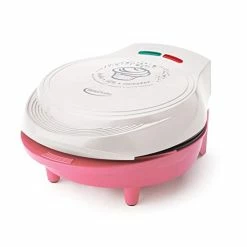
Hot Sale 🎉 Brentwood Mini Donut Maker Machine, Non-Stick, Pink ⭐
Original price was: $25.89.$20.71Current price is: $20.71.
Sale!
Electric Cake Pop & Mini Cake Makers
Original price was: $32.95.$26.36Current price is: $26.36.
Sale!
Electric Cake Pop & Mini Cake Makers
Original price was: $42.99.$34.39Current price is: $34.39.
Sale!

Electric Cake Pop & Mini Cake Makers
Original price was: $29.99.$23.99Current price is: $23.99.
Sale!
Electric Cake Pop & Mini Cake Makers
Original price was: $23.61.$18.89Current price is: $18.89.
Sale!
Electric Cake Pop & Mini Cake Makers
Original price was: $32.99.$26.39Current price is: $26.39.
Sale!


Electric Cake Pop & Mini Cake Makers
Original price was: $15.97.$12.78Current price is: $12.78.
Sale!


Electric Cake Pop & Mini Cake Makers
Original price was: $27.21.$21.77Current price is: $21.77.
Happy Mom –
For $25 (at the time of my purchase) I decided to ignore the very polarizing comments and simply take a gamble on this product by myself. Prior to owning this machine I had never even TRIED a ‘cake pop’ the concept of the frosting mixed into the cake and formed into a ball sounded so gross to me. I was thrilled to come across this machine and discover that I can make cake pops out of JUST cake! Hooray! I also bought 175 Best Babycakes Cake Pop Maker Recipes at the same time. I went with the lemon cake pop recipe and followed the recipe just as instructed. It took me a few tries to get the amount right – I tended to put less in the well than I really needed. Ultimately that bottom well pretty much needs to be totally full.In reference to those that had non-rising, non-sphere shaped cake pops all of those issues seem to me to be a baking issue and not a fault of the machine. These issue can arise due to the eggs not being room temp, the butter being too hot, or possibly the recipe wasn’t calibrated for this particular ‘oven’ and needs to be adjusted accordingly. None of the 1 or 2 stars seemed to me to be a direct result of the machine itself. However, I’m not in their kitchens to know for sure – but for me I get sphere shaped cake pops every time without issue unless I failed to fill the well full enough.In the cookbook there are also recipes for meatballs, appetizers, in addition to the cake pops – I have used this machine and I have made their Mexican Meatballs – and they were delicious! Cooked them all the way through in under 5 minutes. Made just enough for my whole family and I didn’t have to stand at the stove pushing around meatballs for 15 minutes! LOVED IT! Although when they say to use a non-stick spray they REALLY MEAN IT! Do not skip that step or cleaning your Babycakes maker will be quite a pain! **UPDATE** Now that being said they also recommend that in between each round of cooking to clean off the trays – this is realtively easy if you use a wash cloth (to avoid burning yourself or having to wait to cool it down) If you don’t – no matter how much non-stick spray you use it will STILL be a pain to clean. So is it really worth it to cook the meatballs in it? Ehh I don’t think so, BUT the recipes that are in the cookbook listed above translate just as well to a pan on your stove top!Why doesn’t it get 5 stars from me? The cord is REALLY short. Yes, if you have an electrical outlet immediately in front of your ‘work station’ it’s plenty long enough, but if you need to use an outlet that is lower on your wall or further away from your work station you need an extention cord and that seems silly. It didn’t need to be miles long, but an extra 8-10″ would have been MUCH more functional for a more universal length in home-appliances. Additionally, the light system for ready/power is a tad confusing. Ready to cook or ‘ready’ time is up? It simply means it’s hot enough based on the instructions – so you have to use a seperate timer for the pops themselves. I’d really like to see a timer built in. Or perhaps just less confusion – maybe that’s just my own issue though. :)I saw other negative reviews saying it was ‘tinny’ and not well made – I say if you’ve owned a George Foreman and think that was of good quality then you won’t be disappointed AT ALL in this product. I personally think that the metal wells that are within the device are made of better quality than a GF. I certainly will buy this again as a gift for some of my friends that have kids, like to entertain, or just for a fun whatever. I HIGHLY recommend if you are going to buy this machine that you buy the cookbook that was written specifically for this product. The recipes are great and there are a ton of tips on how to use your machine, make the pops, and clean it even! Buy it for $20-$25 you can’t go wrong – some cake pans alone are $20 and you can make a whole lot more than simply the one shape cake pop with this device!**UPDATE** I also recently gave it a go using some store-bought funfetti mix. Worked great as far as creating the sphere shape, but I have to say that the ball wasn’t as dense as the mixes that they provide in the cookbook. Not sure what the difference is specifically – but overall it still worked and was able to create a cake pop just fine. 🙂
Nonni –
Pops didn’t bake evenly on both sides. Bottom side came out well done while top was not. It’s fun and easy to use and cleans up nicely. Kids loved making the pops, but I wouldn’t use their recipe again.
sachopra –
I was so excited about this cake pop maker, but holy buckets, what an epic fail! Seriously – unless you really enjoy endless amounts of frustration, run away now. Burnt cake pops every single time.I bought this cake pop maker in hopes of making a really fun treat for my daughter’s birthday. I read other reviews about burnt cake pops but was won over by the positive reviews. It’s so easy! Hah – yah right. To be on the safe side, I did my homework. I read the instruction booklet cover-to-cover not once, but twice. I googled. I watched YouTube videos. I did everything I could to prep myself for making some great cake pops. Alas, it was not meant to be.When it came time to using the cake pop maker, I did everything “by the book.” I used the recipe in the instruction booklet and didn’t start pre-heating the device until I’d make my cake pop batter. I powered up the maker, and the red light came on, but the green light never came on. I waited and waited and waited, but no such luck.By the way, the whole light thing is super confusing because the instructions say “Lower the lid to closed position and allow the cake pop maker to preheat for a few minutes. When ready, the red POWER light will be illuminated.” The immediate next instruction says “When the cake pop maker has preheated to the proper cooking temperature, the green READY light will illuminate.” So which is it? Red or green??In any case, I let mine preheat for 15 minutes, and the green light never came on. I decided, given the smell and how hot the device was, that I would go ahead and try cooking. I loaded up my cake pop batter, closed the lid and set the time for 4 minutes. Holy smokes – literally. Smoke was POURING out of the machine, and the timer still have over 3 minutes on it. When 4 minutes were up, I checked the cake pops – the bottoms were undeniably burnt. Like unsalvageable. At least they came out of the device without sticking (sigh).Destined to not show up for my daughter empty-handed, I tried another batch. Same result. I had to go through over 8 dozen batches in order to get 22 reasonable cake pops. And here’s the crazy method I had to use:1) Turn off hot cake pop maker2) Just before filling, turn back on3) Fill cake pop maker and close lid4) Bake for 2 minutes5) While still on and baking, flip closed cake pop maker upside down. This is not a joke. I literally had to turn the maker upside down to get slightly not burnt cake pops.6) Bake upside down for 1 1/2 minutes7) Flip cake pop maker back upright and check.Usually, the cake pops were (beyond) done at this point.Fingers crossed my frosting job was good enough to mask the burnt taste. I will never look at a cake pop the same again.Bonus points to whomever suggested using a piping bag to get the batter in the maker. That was a life saver.
Peaches –
This can be used for sweet and savory food love it.
Joeb –
Bought for brother and his wife. They’re bragging about it.
April Cardenas –
I love coming up with all kinds of things to make with this. I’m a baker and use this for some of my desserts. My kids love everything that I come up with. It’s super easy to use and to clean up.